
Simulating TFS shelvesets in subversion
Update
A proper SVN Shelve feature is tentatively scheduled for Subversion 1.8
Original article
Having worked with Team Foundation Server for version control for a few years, there was a slight adjustment for me when I started working with a team that used Subversion. A feature my previous team used was Shelvesets, designed to save code to the version control system but not commit against your daily work. This was useful if you were partially done and got interrupted, wanted to experiment and save for later, or share changes with a teammate. In the end, your code is temporarily saved away for later retrieval.
How it works in TFS
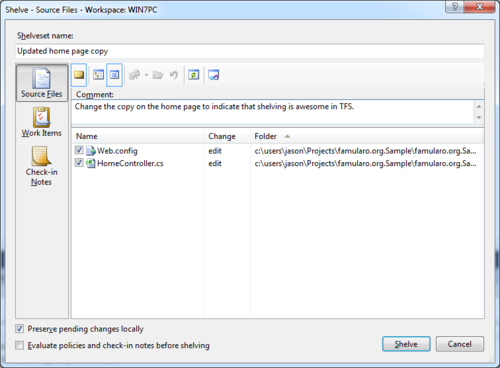
To create your temporary shelveset, right click the solution root, selected “Shelve Pending Changes”, give the shelveset a name, optionally add a comment, select the files to save, give the shelveset a name, decide if you want to preserve the changes locally, and hit “Shelve”. The files are stored on the server, based on your local changes. Your local changes are undone, if you unselect the option the preserve local changes.
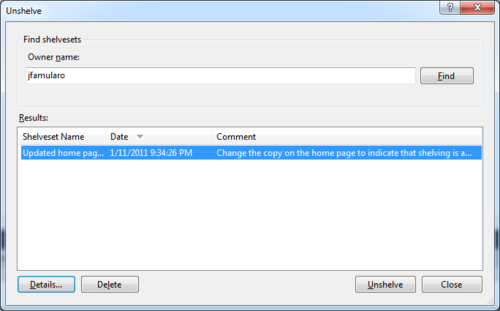
To retrieve, you right click the Solution root and select “Unshelve Pending Changes”. Type the owner’s name, if you are not looking for your shelvesets, select the desired shelveset, and click “Unshelve”. The files are retreived and merged into your local workspace. Please note that in Visual Studio 2010 the menu item has “hidden” itself in the File/Source Control menu.
How it (mostly) works in Subversion
I’ve tested the following with TortoiseSVN and the AnkhSVN plugin for Visual Studio. It’s not nearly as seamless as the TFS solution and leaves a little to be desired. I’ll be using the patch feature in SVN, which creates a file denoting the differences that can be applied back to the original source.
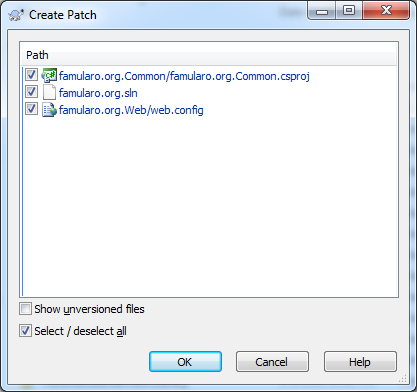
I’ll use TortoiseSVN for the examples, as many will be familiar with that tool. Right click the folder in Windows Explorer containing the changes (likely the solution root) and select “Create Patch” from the “TortoiseSVN” menu. Check the items you’d like to “shelve”, and click “Okay”. Name the patch and place somewhere safe. For a full TFS like experience, create a folder in SVN for your patches and commit. I’ve been keeping them on my local system, which I’ll admit is a little dangerous.
At this point, you can revert your changes. All your changes are saved in the patch.
To restore your changes, right click the solution root and select “Apply Patch” from the “TortoiseSVN” menu. Select the patch you saved in the last step. At this point, you’ll be prompted to merge your changes, one file at a time. This is where the experience is less than ideal. In TFS, if all is well, your changes are auto-merged. In Tortoise, I’m asked to review the changes and resolve conflicts (if any exist), which is important in its own right (TFS prompts to resolve conflicts as well if they exist).
A few things to note. You can share your patches with your team. This is a nice way to shared a proposed change with a co-worker or send your changes to someone for code review. I’ll include a warning as well, although this is generally true with all version control systems. The longer your patch sits unused, the more stale it becomes. At some point, the pain of merging it may exceed that of reviewing the content of the patch and making those changes manually.
I hope this small guide provides some insight for TFS developers making the switch to Subversion. Please leave a comment if you can improve the process. This is just the way I’ve been doing it, and is by no means ideal. And no suggesting Git. ;)